Wallpaper for the kitchen if the ceiling is white. Wallpaper on the ceiling - the choice of the best design options and do-it-yourself gluing technique (112 photos). Finishing requirements for the kitchen ceiling
A beautifully designed ceiling is an essential element of interior design and ceiling wallpaper is one of the most popular surface finishing methods. To date, there are many types of ceiling finishes. The choice depends on material possibilities and organic entry into the design of the room. You can buy stylish chandeliers or lamps by ordering them through a Polish online store, or you can use the most affordable and popular type - wallpapering the ceiling. Due to modern technologies for the production of various types of wallpaper, the ceiling pasted over with ordinary wallpaper or wallpaper for painting will suit any style and design of the room.
Pasting the ceiling is a good solution, both for rooms with high ceilings, and with low ones. By combining different materials, you can divide the room into separate zones, which is especially important for one-room apartments. On the market, ceiling wallpapers are presented in four main types:
- Non-woven;
- Vinyl;
- Glass fiber;
- Liquid.
 Vinyl
Vinyl  Glass fiber
 Non-woven - have a dense base, thanks to which it is convenient to use them for pasting surfaces, they are able to pass air, that is, they can "breathe". Due to its density, they hide minor flaws, cracks, irregularities, are resistant to moisture, and can be used in rooms with high humidity.
Glass fiber will attract attention with its natural composition: quartz sand, clay, limestone. The structure consists of weaves of various thicknesses of glass fibers. Therefore, they can have a different pattern that will suit any design. Glass fiber is strong enough, due to its structure, they will keep the surface in perfect condition, will not allow the appearance of defects. This is a very profitable material that can last up to 30 years, while it will withstand up to 20 repaints for any room design.
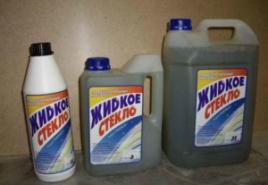
Liquid wallpaper on the ceiling is more like a kind of decorative plaster. Ideal for surface decoration, where there are many corners, ledges, for rooms with low ceilings.
Positive aspects - they have a natural composition, have high adhesion to the surface, are able to accumulate heat, due to the natural composition they do not attract dust. If damage has occurred, then to recreate the original appearance of the surface, it is enough to replace only the damaged area. Minus - not suitable for rooms with high humidity. However, when treated with special preparations, they can withstand moisture. The design of the ceiling with liquid wallpaper is shown in the photo.
 The liquid wallpaper
 Vinyl
They consist of two layers: the upper one is polyvinyl chloride, the lower one is paper or interlining. If non-woven is the basis, then in their characteristics they are similar to non-woven ones. Due to the top layer, they tolerate moisture well. The permissible humidity limit is determined by the thickness of the PVC.
Available in several types:
- Foamed vinyl without embossing. They have an interesting appearance, due to the convex texture they hide surface irregularities well, but they do not have a high density;
- Made by hot stamping: the applied pattern looks like natural stones, textured plaster, heavy metals. They will hide surface irregularities, while due to their unusual appearance they will emphasize the stylish design of the room;
- Flat vinyl, silkscreen - smooth, pleasant to the touch, suitable for perfectly flat surfaces;
- Made by chemical embossing: durable, chemical and UV resistant.
Under the design of the room, you need to choose the right type of finishing material. The photo shows the main types of vinyl wallpaper.
 Foamed
  Embossed
  silkscreen
  Chemical embossing
 Wallpaper for painting
If a decision is made to paint the ceiling on the wallpaper, then you need to know what types are suitable for this. Usually, white wallpapers are chosen for painting, so that they can easily be given the desired color, while the presence of a relief sheet structure will add sophistication to the interior design of the room.
Today, wallpapers that have a matte pattern applied are gaining popularity. The drawing can be made in any color and, when painting, the color of the surface to be painted will not turn out to be monophonic due to the color drawing.
Features of different types:
- Non-woven, vinyl and glass wallpapers are suitable for painting, as they are resistant to moisture;
- Non-woven wallpaper are building and paintable, so it is advisable to choose the appropriate type of material for painting;
- From vinyl wallpaper, it is better to take those based on interlining. The best option for painting would be wallpaper made using the foamed vinyl method. They have a relief structure, most often white, while the reverse side of the sheet is smooth. Easy to use and will give the desired design to the room;
- Glass fiber is produced with different structure, reliefs, ornaments. When staining, you can achieve interesting results. Paint is better to use water-based or latex. Due to the durable structure, wet cleaning is easily tolerated. Examples of painted glass wallpapers are shown in the photo.
 drawing
  Coloring
  Wallpaper for painting
  Types of invoices
  Non-woven for coloring
 Wall mural and 3D
One of the popular types of wallpaper for the ceiling is photo wallpaper. Due to the reality of the image, they can be chosen for any style of the room.
Wallpapers are of the following types:
- Textile;
- Velor;
- Wall mural PVC;
- 3d wallpaper.
Textile wallpapers have a fabric or paper base. The top layer is pasted over with natural threads or silk, linen polypropylene fibers. From this material, many different textures and patterns can be produced. They are not afraid of moisture, they will ideally look on the ceiling in the kitchen.
 Textile
 Velor wallpapers are obtained by pasting the pattern with velor villi. They are soft and pleasant to the touch, create a more realistic effect. At the same time, they are not moisture resistant, suitable for pasting living rooms, bedrooms, children's rooms. Photo options.
 Velor
Velor PVC wall murals tolerate moisture well, so they are suitable for rooms with high humidity. Suitable for decorating kitchens and bathrooms.
 PVC photo wallpaper
 3d photo wallpapers have a three-dimensional look, this is a modern novelty that is gaining more and more popularity among consumers. With the help of 3d wallpapers, you can plunge into the world of unrealistic photo effects and get positive emotions.
 3D wallpaper
 Due to the volume, the 3d picture "comes to life", with the right choice of picture, the space expands. For rooms with low ceilings, 3d wallpaper is a great solution. You can choose a 3d picture for any room design. In the photo are examples of design.
Surface preparation for pasting
Before you start pasting, you need to figure out how to glue wallpaper on the ceiling. First you need to clean and dry the surface, evaluate the horizontalness and the presence of defects. Based on this, it will be seen whether it is necessary to putty or it will be enough just to prime the surface. It will also depend on the choice of wallpaper, their density and properties to mask damaged areas of the ceiling. Puttying the surface is desirable if there are strong defects, or a large angle of inclination.
Depending on the previous design of the ceiling, it must be cleaned:
- If the surface has been whitewashed, it must be cleaned;
- If it is painted with paint, then you need to check it for strength: glue the adhesive tape and rip off sharply. There is paint left on the tape - completely clean it off the surface;
- If there are old wallpapers, then you need to check them for adhesion to the ceiling surface. With tight adhesion, new wallpapers can be glued on top of old ones, if this does not spoil the new color background.
 Preparing for pasting
 How to glue
When the surface is prepared, strips of the required length are cut. To do this, you need to measure the length of the ceiling and cut off the strip a little longer, by 2-3 cm, so that in case of probable shrinkage from the glue, there are no gaps on the surface.
To control the evenness of gluing the strips, the surface must be marked. Make the markup according to the width of the strip, reducing it by 1-2 cm. Make this markup on both sides of the ceiling and pull the threads. Then it will be possible to control the evenness of gluing.
Glue before gluing the wallpaper on the ceiling, dilute according to the instructions. To make the joints invisible, the direction of the strips should coincide with the rays of light penetrating the window, that is, you need to start gluing from the window to the opposite side.
When the glue is ready, lubricate the finished strips with it and fold it with an accordion with the glued side inward to prevent the glue from drying out. Gluing starts from the central part of the ceiling. The strip is pressed against the wall, from the window and we move towards the opposite wall, gradually straightening the strip folded like an accordion. When the ceiling is ready, cut off the excess part of the strips with a sharp knife. You can paste over the surface with your own hands, while you need to have an assistant who will help hold the strip.
During operation, it is recommended to turn off the electricity and close the windows so that there is no draft. Avoid drafts until the surface is completely dry. A little effort and patience and a stylish ceiling that will complement the interior of the room will be ready.
 Pasting the first canvas
  Combination of canvases
  Air extrusion
 Applying liquid wallpaper to the ceiling
Having figured out how to glue wallpaper on the ceiling, you need to figure out how to apply liquid wallpaper. The finished dry mixture of liquid wallpaper is diluted with water according to the instructions on the package, mixed. The consistency should resemble thick sour cream. Apply to the surface with a roller or plastic float. The application thickness depends on the microporous structure of the wallpaper, you should pay attention to the recommended application thickness on the package.
The application can be in one layer, 2-3 mm thick, or it can be applied 4-6 mm thick to achieve a volumetric effect. With the help of embossed rollers, you can create a unique textured surface finish.
 Application
  Finishing
  finished ceiling
 Using wallpaper in design solutions to decorate the ceiling, you can achieve unique effects, and by painting the wallpaper you can get a unique surface that perfectly complements the interior of the room.


Photo gallery (49 photos)


Along with pasting with ceiling panels, the most popular way of repairing a ceiling among the people is pasting the ceiling with ceiling wallpaper. The use of wallpaper for ceiling lining is the cheapest way to repair. Although an important difference here is the fact that coping with wallpapering the ceiling alone is an impossible task, at least one assistant is needed.
The best wallpapers for pasting the ceiling are embossed wallpapers, most often heavy vinyl or non-woven wallpapers are used. For kitchen and bathroom ceilings, it makes sense to use washable wallpaper that can withstand washing with the cheek using chemical detergents.
When choosing wallpaper, carefully read their technological and operational characteristics. Medium-width wallpapers (50-60cm) are easier to glue than wide ones (1 meter or more), but there will be more inter-wall seams when using them, which is not very good when achieving a monolithic effect.
The surface of the ceiling before pasting the wallpaper must be prepared: the ceiling is cleaned, cracks and defects are puttied and sanded, and the ceiling must also be well primed. The thinner and smoother the wallpaper for the ceiling you intend to use, the more carefully the ceiling surface is prepared.
Embossed volumetric wallpaper with a geometric or abstract pattern is the best way to mask the defects of the ceiling surface, we mentioned this earlier. More voluminous wallpaper should be chosen if the ceiling is painted after wallpapering. Two or three layers of water-based paint can noticeably smooth out an overly small wallpaper ornament.

Carefully consider the choice of wallpaper glue. All modern wallpaper manufacturers indicate the type of wallpaper and the recommended type of glue. Usually this is an adhesive for heavy or vinyl wallpaper. When preparing the adhesive mass, it makes sense to make it somewhat thicker than the calculation standards recommend.
Before you start wallpapering, be sure to mark the ceiling. this is a very important point, helping to paste the wallpaper exactly parallel to the walls.

Glue should be applied to both the wallpaper and the ceiling, then gently attach a piece of wallpaper to the intended line on the ceiling and carefully level it with a soft roller. When pasting the ceiling, air and excess glue must be removed even more carefully than when pasting walls with wallpaper, since the overhead lighting of the chandelier will subsequently emphasize even the slightest defects and flaws in the surface.
The wallpaper on the ceiling is joined end-to-end, with a possible lagging of the wallpaper along the edges, these places should be immediately smeared with glue and pressed well.

The ceiling, pasted over with wallpaper, will look complete if you use a ceiling plinth for its decoration, which is also used when gluing the ceiling with ceiling panels. If the room has a low ceiling, then it is best to use a wide ceiling plinth, this will visually increase the height of the room, add volume to the room.
How to glue wallpaper for painting
Every year, the so-called wallpaper for painting is gaining more and more popularity. Wallpapers designed for painting with water-dispersion, water-based or acrylic paints have a number of advantages compared to traditional paper wallpapers with a ready-made pattern applied to them.

Firstly, the wallpaper intended for further painting has a texture that gives the surface of the walls a unique look, expressiveness and character. In addition, the embossed structure of the paintable wallpaper perfectly masks unevenness and other surface defects in the walls.
Secondly, wallpaper for painting can be repainted several times, and not necessarily in one color. Thus, with each new redecoration of the apartment, you can easily change the boring color scheme of your home.
Related video: How to glue wallpaper on the ceiling, all the nuances, (repair in the apartment).
Thirdly, properly selected and high-quality wallpaper for painting gives the walls a coherent and monolithic look, the wallpaper stripes are almost invisible.
In our stores, supermarkets and building materials markets, wallpaper for painting is represented by three main categories (types) that differ in materials for their manufacture:
- wallpaper for painting on a paper basis (the most budgetary, inexpensive wallpaper option),
- non-woven wallpaper (non-woven wallpaper),
- fiberglass wallpaper.
The first two types of wallpaper for painting have an external decorative structural layer of special foamed vinyl, which is why such wallpapers are popularly called "vinyl" wallpapers. The outer layer of fiberglass wallpaper for painting consists of quartz sand bonded with special binders.
Paper-based wallpapers withstand 5-7 paints for the entire period of their operation, and more expensive and high-quality non-woven and fiberglass ones - up to 15!
All paintable wallpapers are classified as heavy wallpapers, so their gluing has several features.
- For gluing, special adhesives are used for heavy (vinyl, non-woven) wallpaper.
- Wallpapering for painting is necessarily done using the “butt-to-butt” method.
- Painting of wall-paper is made after their full drying.
Before buying wallpaper paste, be sure to read the wallpaper manufacturer's instructions for gluing and using wallpaper, pay attention to the recommended types of wallpaper paste. Wallpaper for painting is glued in the same way as any other wallpaper, and yet experts advise to be guided by several special important rules.

How to glue paper-based wallpaper for painting? Prepared, cut along the length of the wallpaper canvases are spread on the floor and carefully coated with a small layer of special glue for heavy wallpaper. For reliability, experts recommend diluting the adhesive with a slightly more concentrated consistency than indicated in the instructions for its use. When cutting wallpaper, it is better to leave a small margin of length.
Lubricated wallpaper is folded across with adhesive parts inward and allowed to soak for no more than 5 minutes. Meanwhile, the surface of the wall is treated with the same wallpaper glue, a thin but uniform layer will be quite enough for this.

After the end of the process of coating the wall with glue, the prepared wallpaper sheets are glued to the wall.
When gluing wallpaper for painting on a paper basis, special care must be taken, because due to its fragile paper base, when excessively moistened with glue, they tend to deform, stretch and even tear. And “overexposed”, excessively swollen wallpapers, especially cheap ones, can almost completely lose their decorative embossing.
To prevent this from happening, they need to be smeared with glue quickly, evenly and in a thin layer, and also try not to overdo it when wetted. All these precautions practically do not apply to durable non-woven wallpaper. because this synthetic material does not stretch, does not deform and is strong enough. But non-woven wallpaper for painting have their own, unique features of gluing.

Unlike paper-based wallpaper, non-woven wallpaper does not need to be pre-lubricated with glue. When gluing them, a section of the wall with a width slightly larger than the glued wallpaper is well coated with wallpaper glue.
Then they just take a roll and gently smooth it out, glue the wallpaper from ceiling to floor. The non-woven base, which has excellent adhesive properties, allows you to glue the wallpaper to the wall without much effort. All that remains is to cut off the excess part of the wallpaper with a sharp knife exactly under the plinth.
Experts note not only the simplicity and ease of sticking non-woven wallpaper for painting. but also their other, no less important advantage. The non-woven base of such wallpapers is an excellent binding and fastening material. Non-woven wallpaper glued to the walls significantly strengthens, reinforces its surface, and prevents the appearance of small cracks.
It will be useful to know that interlining is well glued not only to wall surfaces, but also to any other surfaces - ceilings, door and window slopes.
Source: remont-da-stroyka.ru
What wallpaper is better to choose on the ceiling
To start the selection, you need to decide on the range of types and characteristics. Someone claims that the use of heavy types of wallpaper is unacceptable, but we will try to refute this from the point of view of practicality and aesthetics, but for now we will decide what material is used in the ceiling decoration:
- non-woven vinyl,
- non-woven paper.
Each of these materials can be in different colors, have textures, reliefs and various decorative coatings. But for the ceiling, white color or wallpaper for painting is still preferable.

Let's return to the issue of using heavy canvases. For some reason, there is an opinion that a canvas that is too heavy will simply sag under its own weight due to the fact that the mass of wallpaper with glue is much higher. This is all perfectly acceptable, but:
- If the surface is well prepared, if the ceiling is fairly even and high-quality glue is used, you can not think about this nuance.
- In addition, the denser the wallpaper, the more irregularities in the surface they will hide. And there is inestimable merit in this.
Wallpaper selection
Now let's take a look at the features of choosing each type of wallpaper. To do this, we will analyze the premises by main types.

The choice of wallpaper in the living room means in the hall, in the bedroom, in the living room, in the utility room - in the kitchen, corridor, bathroom. The type of wallpaper directly depends on the type of room. For example, a kitchen or a bathroom are rooms with a fairly high level of humidity. In the kitchen, due to the temperature difference and the lack of an extractor hood, condensate can easily collect, which can then turn into mold damage to the walls.
That is why it is best to take thick vinyl wallpaper on non-woven base. The lower the paper content, the better in such cases. In addition, vinyl wallpaper can be easily washed. This is another point that is important for gluing in the kitchen.

Very often, various fumes leave marks on the ceiling. Removing stains from paper wallpaper is an art. But the use of vinyl or non-woven will solve this problem simply. In case of serious contamination, it can simply be washed off with ordinary soapy water, without difficulty. Naturally, if there is no decorative coating on the canvases.
In the bedroom or in the hall, it is quite possible to use paper canvases. Especially if the rooms are dry and warm, with flat ceilings. In addition, paper wallpapers are much lighter and cheaper. As for liquid wallpaper, their choice is universal. They can fit both in the kitchen or in the bathroom, and in the hall with the bedroom.

Liquid wallpaper, in fact, is plaster with various decorative additives. But with proper use and application, liquid wallpaper can even get rid of a foggy mirror in the bathroom, as it allows air to pass through perfectly. Moreover, there are a lot of decorative options for liquid wallpaper. It is enough even to look at the photo catalog of manufacturers.
Roll Width
Why should you pay attention now? It's simple: there are several sizes of rolls. The most common width indicators: 50, 55, 100 cm, length: 5, 10 meters. There are more, but this is the exception rather than the rule.

The width of the ceiling roll is important. The wider the roll, the more difficult it is to glue the strip. However, the surface will be more uniform and aesthetic. Although narrow wallpaper is no worse. It's just that if the surface is large enough, for example, the dimensions of the rooms are 5 by 4 meters, it is better to use wide wallpapers.
Adhesive selection
Not only is the choice of the right wallpaper important, but also the choice of mixture for installation. Glue today is not just a starch solution, which will not always take one form or another. These are professional polymer compositions that are prepared for a certain type of wallpaper. Therefore, it is important to know which wallpaper is purchased in order to choose the right glue.

For all types of wallpaper with the addition of polymer particles (vinyl, non-woven, non-woven paper, etc.), it is best to choose an adhesive for heavy canvases, even if the main composition of the wallpaper is paper. This will just prevent the canvas from sagging under its own weight.
Source: info-potolki.ru

Sticking wallpaper on the ceiling: the order of work
The ceiling, finished with wallpaper, has a rich set of visual effects. It will not only make the room more comfortable, but also allow you to delimit the room into zones. This is especially true in one-room apartments, where the only room serves as a bedroom, study, living room and dining room. In addition, the porous structure of the material provides additional sound insulation.
What types of wallpaper are suitable for the ceiling?
The composition of the wallpaper for the ceiling are different. These are paper, non-woven, vinyl, liquid and glass wallpapers. Embossed textile or non-woven wallpaper is best suited for pasting. They hide surface defects and provide sound and heat insulation.
Often wallpaper is glued to the ceiling for painting to give them the desired color or draw some kind of pattern. In rooms with high humidity, a waterproof film is good. It sticks easily and protects the surface from water.
Related video:
Preparation for pasting: cleaning and priming
So, you have decided which wallpaper to choose for the ceiling, now you can move on to the main thing. But take your time. First, the surface must be prepared. To do this, the ceiling must be cleaned with a spatula from the plaster and primed. Particular attention should be paid to the joints of the ceiling tiles.
The primer must be selected in accordance with the selected type of wallpaper. Most often, deep penetration acrylic primers are used. This operation may take more than one day, because. The primer is applied in several layers, allowing each of them to dry. The dried primer must be sanded to level the surface. Before processing, cracks, if any, must be filled.
The processed ceiling must be marked so that the wallpaper is glued perpendicular to one of the walls. The place where the chandelier will hang should be sealed with masking tape, and before pasting, turn off the electricity.
Getting to the gluing stage
Wallpapering the ceiling is an activity for two. So, before you pick up a cutter and roller, stir the glue and spread it on the ceiling, find yourself a partner. Now you can get started.
Related video: Do-it-yourself ceiling wallpaper
The glue must be made very thick so that it does not drip from above and holds heavy ceiling wallpaper. To avoid problems with a wet strip, glue should be applied to the ceiling. Pasting must be started from the wall and at the same time keep the strip so that it is directed strictly along the markings. After that, you need to press the paper to the ceiling and level it with a roller.
The following strips are glued end to end. In this case, care must be taken to ensure that gaps do not form between them. After completing the pasting, you can relax: the wallpaper will dry for about a day. If you used paintable coating, then the next step is to paint the surface. To do this, you need to paint the wallpaper with a roller several times, and then bring the surface to perfection with a sandpaper.
Often, after pasting, uneven edges form. It's not a problem. They can be carefully cut with a cutter, and then hidden with a ceiling plinth. The variety of shapes and colors of cornices makes them appropriate in any interior. If you glued the wallpaper for painting - after completing the main stage, we proceed to the painting work.
How to care for ceiling wallpaper?
To make the wallpaper last longer, they can be varnished. Many paintable wallpapers can withstand more than one color, so this ceiling finish is very economical. If the wallpaper began to peel off, you need to coat the fallen edges with glue and press them to the ceiling with a roller.
Embossed wallpapers tend to absorb unpleasant odors and dust. Therefore, they must be cleaned periodically. Cleaning is done with a brush, vacuum cleaner or dry cloth. And moisture-resistant materials can even be wiped with a damp cloth.
Source: vopros-remont.ru
How to choose and stick wallpaper on the ceiling
When the question of finishing the ceiling arises, only three options come to mind: painting, suspension or tension structure. It seems that the choice is not great, but there is another option - decorating the ceiling with wallpaper. This way of finishing has always been original. It opened up great opportunities for the designer. With the help of wallpaper on the ceiling, it was possible to create an incredibly beautiful and exclusive interior. In addition to a beautiful appearance, the option of finishing the ceiling with wallpaper has a number of advantages:
Related video: how to glue non-woven wallpaper for painting on the ceiling
- There is no need to often paint the ceiling, if suddenly it has faded from low-quality paint.
- There is no need to spend big money on the construction of a suspended or tension structure.
Like any repair process, wallpapering the ceiling is divided into several stages. The correct sequence of work is important, so be careful.

Ceiling preparation.
The first thing to do is get rid of the old finish. If it is whitewash, then it should simply be washed off with warm water. If the ceiling is painted with water-based paint, then you will have to work with a spatula with a spatula.
The second is the alignment of the ceiling surface. When dismantling the old finish, small defects may appear, so the ceiling must first be treated with a deep penetration primer. This material will not only increase the adhesion rate, but also strengthen the top layer.

If there is a slight difference in the plane, then it can be removed by applying a thin layer of finishing putty to the ceiling, which, after drying, is polished with fine-grained sandpaper or a special paint synthetic mesh. Grinding is done in circular motions without strong pressure.
And the last operation at this stage is another layer of primer, after which it dries, you can proceed to the process of gluing.
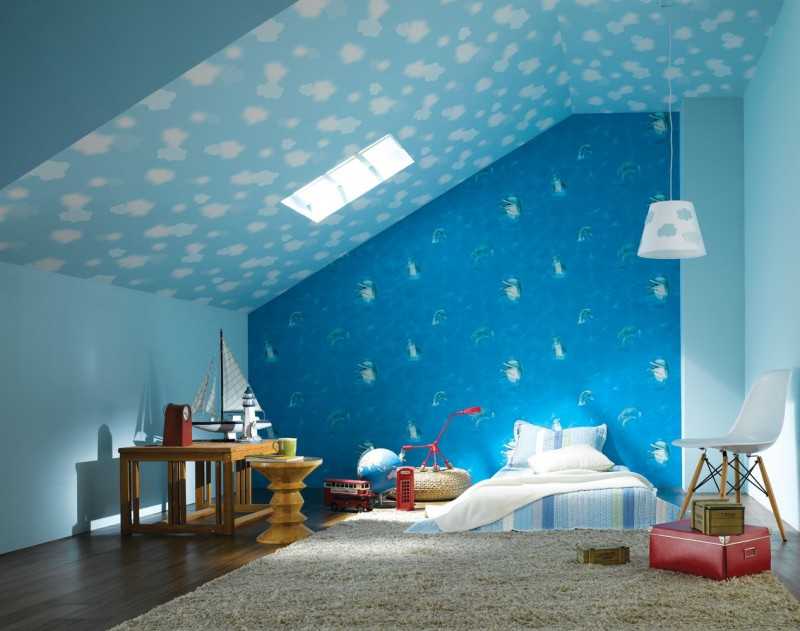
Decide what wallpaper you will use for decoration. There are no special restrictions on the choice, you can use everything that is on the market today. Photo wallpapers are very popular, for example - blue sky and white clouds or a starry sky.
Wallpaper on the ceiling for painting is especially popular. The peculiarity of such wallpapers is that they can be repainted. If you are tired of some color, then there is no need to remove the old finish, you can simply apply a new paint.

Prepare the tools you will need for finishing:
- Roller and brush,
- Special rubber roller or plastic spatula,
- Scissors and knife
- clean rag,
- Ladder,
- Paint bath.
In order not to experience difficulties in the process of wallpapering the ceiling, take care of having a partner who will work below.
Related video: Wallpapering on the ceiling.
You can glue the wallpaper yourself without an assistant. In this case, the wallpaper canvas folds into an accordion, but this method requires a lot of experience, so it is beyond the power of a beginner. And another important point that you need to pay special attention to is a strong and wide pedestal, from which the probability of falling is minimized. To do this, it is better to use a table or install goats.
Wallpaper sticker. The sticker process depends on which wallpaper you have chosen. For example, if it is paper or vinyl wallpaper, then the glue must be applied to the material itself. If it is non-woven wallpaper, then the glue is applied to the ceiling. The glue applied to the vinyl wallpaper needs to be kept for a couple of minutes, but you can’t do this with paper ones - they applied the adhesive and immediately lay the material on the ceiling surface.
The strips of material are laid parallel to the window. In natural light, the joints between the stripes will be invisible. Therefore, trimming the wallpaper is based on the longitudinal size of the room.

- Apply glue to the first strip from the center of the strip to the edges. Pay attention to the fact that the glue does not get on the front side of the wallpaper.
- One person climbs the goats, carrying in his hands one of the edges of the wallpaper strip. The edge must be glued to the corner of the room, stretching it along the ceiling and leveling it over the entire area.
- After gluing the strip, remove the remaining air and excess glue from under it. To do this, you will need a clean roller.
Air bubbles and joints should be rolled with a rubber roller.
This procedure must be repeated with the remaining strips. The only point that can be difficult is to glue the adjacent strip to the already glued one. The sticker is made butt-to-butt, if the wallpaper you have chosen has a pattern or pattern, then you will have to withstand the combination of two adjacent strips, so even at the trimming stage, you need to pay special attention to this.
The excess is cut off before the glue dries with a knife and a long spatula. The joint between the walls and the ceiling can then be closed with a ceiling plinth.
Source: remboo.ru

How to glue wallpaper on the ceiling
The most common type of wallpaper for gluing to the ceiling is wallpaper for painting. This type of wallpaper is produced on a paper basis and on non-woven.
Wall-paper on a ceiling on a paper basis. For paper wallpaper, you need to carefully prepare the surface. Such wallpapers practically do not hide even small defects and can be torn if carelessly pasted. This finishing option is quite economical, but only on condition that the surface of your ceiling is perfectly flat.
Non-woven wallpaper. If the surface is very uneven, then more embossed and structural wallpapers are selected. So you can visually level the uneven surface.

Important: the weight of wallpaper on the ceiling should not exceed 110 g/m². Before describing the process of gluing wallpaper on the ceiling, we will determine what tools and fixtures we need for this.
Tools for the job
Wide and narrow paint brushes. You will also need a square, tape measure, pencil and a container for diluting glue.

How to hang wallpaper on the ceiling
We measure and cut the wallpaper into strips. When calculating the length of the strips, you need to take into account the windows in the room, or rather, their location. To make the seams between adjacent strips less noticeable, you need to glue the wallpaper in the direction of the window, that is, in the light of the sun's rays.
Another nuance is the creation of a margin, that is, the strips should be cut to a greater length so that when glued to the ceiling, the ends of the strip go onto the walls by 2-3 cm, then they will need to be cut off.
Glue preparation. Before applying the adhesive, make sure it is suitable for the type of wallpaper you are using. Carefully read the instructions for preparing the glue on the package. Remember that there are wallpapers with an adhesive layer already applied, which must first be immersed in water.

We apply glue to the wallpaper. Glue should not be applied to all strips at once, but 2-3 pcs. at a time so that the wallpaper does not get wet. Lay the strip of wallpaper face down. With a wide brush, apply the adhesive composition from the center to the edges. The thickness of the adhesive should be 0.3 - 0.8 mm. First, coat about 2/3 of the cut strip, and then fold this part (glue on glue).
Let the wallpaper soak. After that, it is necessary that the wallpaper is saturated with glue.
Ceiling markings. Mark a line on the ceiling equal to the width of the strip (at least 50 cm from the edge of the wall). Stick paper masking tape on the marked line (under the seam).
Pasting the first strip of wallpaper on the marked area. Apply glue to the marked area of \u200b\u200bthe ceiling with a roller. Fold the strip of wallpaper in half so that its wrong side is inside.
For the convenience of gluing, one person, standing on the floor, should pass the folded strip to another, who is standing on a stepladder. Align the end of the wallpaper with the marking line and press firmly against the ceiling. Wallpaper, at the same time, should “find” a little on the wall.
Using a rubber roller or plastic spatula, go over the glued strip of wallpaper from the center to the edges, smoothing it out. So you get rid of air bubbles or folds that form during gluing. Press the longitudinal part that goes onto the wall tightly against the corner.
Sticker the rest of the wallpaper strips. Stick the second strip on the ceiling next to the first (butt). The second canvas must be glued from the transverse wall, pressing the end of the part of the wallpaper smeared with glue at the horizontal marking line. Then all other wallpaper strips are glued in the same way.
The second strip of wallpaper and all subsequent ones also need to be smoothed with a roller from the center to the edges.

Wallpapering in corners. In the corners, the wallpaper should be gently pressed with a clean brush and put a mark with a pencil - it will determine the exact position of the corner. After that, separate a small section of wallpaper in the corner from the ceiling again and, guided by the mark, carefully cut out the “extra” section of wallpaper from the corner.
Remember that you should cut off the excess piece of wallpaper in the corner quickly so that it does not have time to stick to the wall: otherwise the unnecessary part of the wallpaper will be very difficult to remove. Learn more about wallpapering corners.
Wallpapering on the ceiling around the lamp. To glue the wallpaper under the chandelier, you need to remove it from the ceiling and stick a strip of wallpaper around its box, after making an incision for the wire. Then cut the wallpaper so that the lamp box, which is installed in place, completely hides the cut out area. After that, you can connect the wiring and install the lamp in place.
Do not connect the electricity until the pasted wallpaper is completely dry.
If you do not remove the lamp from the ceiling before gluing, a seam will be visible opposite the wallpaper strip. When all wallpapers are pasted, they should be allowed to dry, and it is necessary to create good conditions (no drafts and no direct exposure to sunlight). When renovating an apartment at this stage, it is important that the room is closed, and the interior is warm and humid. Only in this case, the wallpaper on the ceiling will dry well.
Source: www.samoremont.com

How to glue ceiling wallpaper and ceiling wallpaper for painting?
Having started a large-scale renovation in an apartment, people simply do not know where to start. Personally, I would recommend first of all to choose wallpaper for the ceiling, and specifically - their appearance. You can choose imported or domestic, vinyl, non-woven or paper, convex or flat, regular or paintable.
Related video: Wallpaper on the ceiling, stupidity or design move
Pros and cons of ceiling wallpapering
Why do I recommend using wallpaper, and not whitewash or paint? If we leave behind the aesthetic beauty that can be achieved with the same painting, then the wallpaper can boast of the cleanliness of the process of gluing them. Of course, relative cleanliness, although compared to paint and plaster, it will seem perfect to you.
The surface under the wallpaper is also much easier to prepare. Well, as for the shortcomings of wallpapering, here it is worth mentioning the inconvenience of the process. It is unlikely that you can do everything alone, and the two of you, most likely, are tormented.
What are the stages of the process?
- choosing the wallpaper you want,
- ceiling preparation,
- wallpapering.
Choosing wallpaper for the ceiling
The choice of wallpaper is, first of all, the choice of the coating of the finishing material. Wallpaper can be paper, vinyl, non-woven, liquid, textile. The material determines not only their appearance, but also the strength of the coating. If possible, the wallpaper should be moisture resistant, otherwise, after applying the glue, it will be very difficult for you to stick it without tearing it. As for the design (color, 3D effect, starry sky, clouds), we pay attention to it in the second turn, although for the interior it is the appearance that determines what matters.
Pay attention to such a parameter as light fastness. The fact is that the vast majority of the walls in the house at one time or another are illuminated by the sun, which can subject the material to fading. And burnout is not only a change in color, but also a sharp decrease in the durability of the wallpaper coating.
The structure of the wallpaper should also not be ignored. Multi-layer coatings will last you longer, plus they will mask all the small flaws in the wall surface. In addition, the thicker the material, the more heat-shielding and sound-proofing properties it has. The price of multilayer wallpaper is higher than usual, but all of the above characteristics fully justify it.

Make sure your wallpaper is safe and environmentally friendly. If they contain toxic substances that under certain conditions will be released into the atmosphere, then this is a low level of environmental protection, and we do not glue such wallpapers in residential premises.
As I said, preparing the ceiling for wallpaper will not require serious efforts from you. You will only need to prime the problem areas of the surface and the entire ceiling as a whole, so that the ceiling wallpaper for painting adheres better to it. At the same time, the primer provides good air exchange, as a result of which there will be no stale air in the room.
It is necessary to remove the old paint and remove the whitewash, although some experts do not particularly insist on this. The primer must be applied with a brush. It dries quickly, so you can start gluing the same day. Large irregularities and cracks in the ceiling are treated with putty.
How to glue ceiling wallpaper?
We stock up on tools. We need a wide brush, a seam roller, scissors, a wallpaper brush. As you understand, in order to glue liquid wallpaper on the ceiling, you will need completely different tools.
We measure the side wall in length. This indicator will determine the length of the canvases you need. We make control notches on the ceiling, which will determine the width of the canvases. Next, we cut the canvases according to previously determined sizes, making a small margin. We put the chopped canvas in a pile, “face” down.
We apply thick glue with a wide brush to the middle of the canvas, carefully distributing it over the entire surface of the material.
We fold the finished sheet with an "accordion". The depth of each fold is 30 centimeters. We wait a few minutes until the glue is absorbed and the paper becomes pliable. Do not overexpose, because paper wallpaper for painting on the ceiling may tear.
We take a stepladder, a table, a chair or whatever you want. We keep a wallpaper brush, a seam roller and scissors in close proximity. Next, holding the wallpaper with one hand, we apply the last section of the "accordion" to the ceiling. We press it, smooth it with a brush to the edges from the middle. This operation is performed along all the folds of the "accordion", with an orientation to the lines of control that we did earlier.
The second canvas should be laid along the edge of the first. Make sure all seams are clean and tight.
Even before the wallpaper is dry, you need to level the wallpaper joint, and then prepare a place for the chandelier by making a cross-shaped incision in the right place. This will help avoid the wrinkle effect.

If you want to achieve a neat junction of the wallpaper with the wall, run between the wall and the ceiling with the blunt side of the scissors, then take the canvas a little and cut along the break.
Gone are the days when ceilings were plastered in apartments and houses. This method is used, but ceiling wallpaper replaces conventional plaster. Thanks to the many varieties of materials, it is permissible to paste over a “roof over your head” by any means, depending on the wishes and preferences of consumers.
Types of wallpaper for the ceiling
Wallpaper, which is used for pasting the ceiling space, there are several types. They differ in composition and appearance. Our gallery provides various images of interiors with pasting examples. Photos of wallpaper on the ceiling can be viewed below and finally make your choice.


Vinyl wallpapers
Representatives of this species are highly durable and can be used in different rooms, even in the kitchen. They consist of a non-woven layer and a thin PVC outer covering. They differ in thickness and decorative coating. Wet cleaning withstand thick wallpaper. Thin models are wiped with an almost dry cloth.
Wallpaper with a relief pattern printed on them is able to hide the irregularities of the ceiling and joints in prominent places. Depending on the color preferences, in stores there is a wide range of such wallpapers for the ceiling, including for painting.

Non-woven wallpaper
This pasting material is considered more environmentally friendly than the previous one. Wallpapers are durable and have a relief structure that hides minor irregularities on the ceiling. In the course of work glue is applied only on the pasted surface.

Flizelin is easily removed with water. This facilitates the work when removing old and gluing new canvases.
Glass fiber
This material is the safest, as it is made only from natural materials. Its distinctive properties are: wear resistance, incombustibility, durability and practicality. Wallpaper can be repainted and washed many times. Such manipulations do not affect their quality.

The wallpaper has a back and front side and is sold in rolls. Some manufacturers mark the wrong side with color.

The liquid wallpaper
In other words, this coating can be called decorative plaster. Outwardly, it resembles an ordinary plaster mix, but unlike it, there is no sand in the composition of liquid wallpaper. Replaces its natural component - cellulose.


Liquid wallpaper on the ceiling is practical to use. If the surface is damaged, it is enough to remove the old layer of liquid wallpaper and apply a new one. Thus, it is not necessary to re-paste the entire area.

The material is able to hide even obvious irregularities. Liquid wallpaper is recommended to be glued on a surface that has many protrusions and corners.

Another important factor in favor of wallpaper plaster is ease of application. They do not require adjusting the pattern and joining the canvases.

Wallpaper to be painted
If you spend several hours in the store choosing wallpapers, but the purchase has not been made, do not be upset. The desired color and pattern can be done by yourself. For this purpose, there are wallpapers for painting.

They are usually available in white with or without embossed patterns. Such a ceiling can be repainted up to 7 times. Wallpaper on the ceiling, which require painting, are based on vinyl or non-woven.

Pasting technique
Finishing the ceiling with wallpaper is considered a time-consuming and short-lived process. Conventional pasting materials will have to be changed every five years. Liquid wallpaper will last longer and it is enough to update them in places if they are damaged.

Alone, it is difficult to carefully paste over the ceiling space. You have to constantly keep your hands on weight and throw your head back. From an uncomfortable position, the arms and neck become numb.


If, nevertheless, the decision is finally made in favor of the wallpaper, then one or more assistants will be required for work. Otherwise, the owner is waiting for: damaged wallpaper, spent money and time.

To answer the question of how to glue wallpaper on the ceiling, you need to touch on a few points. Before starting work, it is necessary to thoroughly clean the surface of old plaster or wallpaper. Then putty all the bumps and damage to the ceiling. After preparing the surface, wallpaper is glued to it.

Pasting the ceiling with wallpaper starts from the window to the door. It is advisable to measure the location of the canvases on the surface. Then you get an even layer. It should also be noted that not all houses can have even ceilings. Then all the flaws will be less noticeable at the door of the room.

Cloths in the process of pasting can shrink. To do this, it is recommended to add 2 cm on each side of the glued panel.

Glue should be diluted in accordance with the proportions offered by the manufacturer. If the solution remains, and the work is postponed to another day, the container should be covered with a plastic bag. The glue will not dry out and can be reused.


Thanks to new technologies and materials, the owners of any apartment or country house are given the opportunity to choose the way to decorate the ceiling to their liking. The appearance of the glued surface allows you to decorate the fresh look of the room, making it unusual and original.


Don't be afraid to experiment and innovate. The modern ceiling will fit perfectly into the overall interior of the room and will inspire new creations and undertakings.

Photo wallpaper on the ceiling


Wallpaper for the ceiling plays a very important role in the design of the interior of the room. They set the basic style and texture of the entire room. The procedure for choosing wallpaper is a very personal process, as everyone has their own preferences and tastes. And given the fact that after the repair you will see the wallpaper for more than one year, you should choose with great care. Today we will talk about how to choose wallpaper for the ceiling.
Types of wallpaper for the ceiling
A very original version of the photo wallpaper. They are distinguished by sophistication and beauty. The pattern of such products may be different. In addition, you can order wallpaper for the ceiling in the nursery, made according to a specific photo or image. Agree, it is very pleasant to observe exactly what gives you the greatest comfort or peace of mind.
If you want to wallpaper in the bedroom, then products with the image of the starry sky are perfect (more details: ""). If desired, such a surface can be coated with a special paint that will make the stars shine like real ones.
New technologies have firmly entered this area of interior design. So, now on sale are available, which are perfect for large and spacious rooms. Thanks to a special print, the objects depicted on the canvas are as if real.

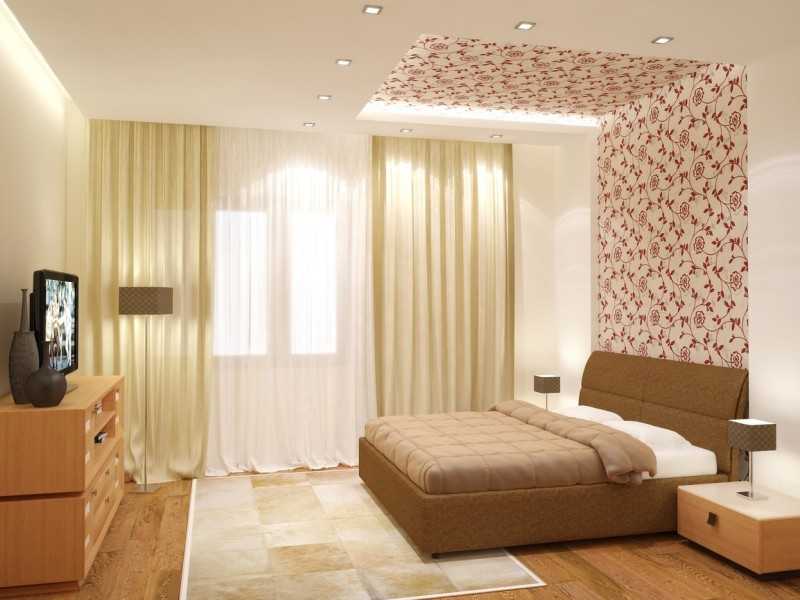
The color of the ceiling should be chosen in accordance with the functional purpose of the room. Beige and white tones are suitable for the bedroom. For the bathroom and living room, a great solution would be to use lilac and blue. Wallpaper on the ceiling of the kitchen should be appetizing. For lovers of luxury, black color is suitable. But it is recommended to use it only with backlighting, otherwise the room will become gloomy.
What wallpaper to choose on the ceiling?
Wallpaper for the ceiling in the kitchen has lost its leadership in the ceiling design segment. In their place came other types of finishes. But, nevertheless, only they are capable of providing high possibilities for decorating ceilings for such a low price.
Ceiling wallpapers are produced by both domestic and foreign companies. Particularly high-quality products from German manufacturers, but it is they who do not have the so-called segment of "ceiling" wallpaper. After all, in Europe it is customary to cover such a coating with paint.

If your room is not large, then it is better to purchase glossy wallpaper for the ceiling. They have excellent light reflectivity, which allows you to visually increase the height of the ceilings.
One of the non-standard solutions is bamboo wallpaper for the ceiling.
Such products have some advantages:
- they are environmentally friendly;
- durable;
- universal.
Well, now you know a little what wallpaper to choose for the ceiling, but we will not stop there, as there are even more sophisticated solutions.
Wallpaper for the ceiling for painting
Wall-paper on a children's ceiling in the best way mask the main defects of a ceiling.
In addition, they have the following advantages:
- the ability to apply any pattern, regardless of its complexity;
- the picture can be changed during the operation of the wallpaper.

If you have firmly decided that throughout the entire life of the wallpaper you want to have one pattern, then, after applying it, the surface is covered with special solutions. They allow you to fix the image, protecting it from fading and pollution.
Finishing the ceiling with wallpaper allows you to use almost all paints - acrylic, latex and water-based.
Liquid wallpaper for the ceiling
And quite recently, a new revolutionary material burst into the building materials market - liquid wallpaper.
Such a novelty immediately found its fans and for good reason:
- you can apply such wallpaper on any surface, from cement screed to wood and metal;
- fill the cracks on the surface, so there is no need for pre-treatment of the ceiling;
- such wallpapers are the ideal solution for hard-to-reach places;
- wallpaper does not leave seams;
- during their pasting there is no specific smell.

If you want to see how such a novelty looks like, then you can find a photo in the catalog of our portal.
The composition of liquid wallpaper
Such fights are sold in boxes. They are in powder form.
Wallpaper includes:
- mica;
- natural dyes;
- cellulose and cotton fibres.

In addition to these components, the composition of the wallpaper may include gold threads and silk. Due to its fibrous structure, this coating provides fairly good sound insulation.
How to decorate the ceiling with wallpaper?
Preparing the ceiling for wallpaper
Now you know which wallpaper to choose for the ceiling and it's time to start analyzing the process of decorating rooms with their help.
Before pasting the wallpaper, it is necessary to properly prepare the surface of the ceiling. It begins with the cleaning of the old finishing material. If the old wallpaper does not peel off very well, then you should wet them a little. If the previous ceiling coating was enameled paint, then it is simply washed with soapy water. The lime is washed off with hot water.

Shpatlyuyut ceiling only in case of large defects. But this does not apply to the primer, since such processing of the ceiling improves the adhesion of the ceiling and wallpaper, and this directly affects the durability of the coating.
It is necessary to mark the ceiling so that the wallpaper is glued parallel to the rays of light (allows you to visually hide the joints). If the wallpaper is glued for painting, then this is not necessary.
Glue preparation
Prepare the adhesive 30 minutes before wallpapering. In doing so, strictly follow the manufacturer's instructions. Keep track of the homogeneity of the resulting mass. The formation of lumps must not be allowed. To do this, the glue is stirred for 10 minutes. As a result, the mixture should be quite viscous, but at the same time not thick. And, of course, glue should be selected in accordance with the type of wallpaper purchased.
We glue the first canvas
If you have paper-based wallpapers, then after spreading them with glue, give them a few minutes to soften. In the case of non-woven wallpaper, the ceiling is smeared with glue. To apply it, use a roller or brush. In this case, the glue is applied from the middle to the edges.

It is advisable to enlist the help of one of the relatives or friends, since it is inconvenient to glue the wallpaper yourself. One person on the floor will serve the wallpaper to the one who stands on the stepladder and sticks it.
The end of the canvas is connected to the marking line drawn earlier. At the same time, they make a mandatory overlap on the wall. To obtain a high-quality result, press the center of the web and push a strip of material with smooth movements to the sides. Do this with a roller or clean hands.
Non-woven wallpaper costs from 400 rubles per roll. Liquid wallpaper has a cost - 32 rubles. for 1 kg. At the same time, a kilogram of the mixture is enough to cover a surface of 3.5-4 square meters. m. have approximately the same price, about 30-40 rubles. per roll. But there are also offers with a much higher cost, since we have given only the lower limit of the price for the material. What is the best wallpaper for the ceiling? It all depends on your financial capabilities and the functional purpose of the room. And remember, the more expensive the wallpaper, the better it is.