Learn how to properly install laminate. How to lay a laminate correctly - calculation, preparation and execution of work What you need to lay a laminate yourself
How to lay laminate yourself
Recently, there has been an increasing trend that the owners of apartments and houses perform finishing work on their own. Some are for fun, others are for savings. And this is quite understandable, because the installation of new ones is usually simple. In addition, you can find a lot of detailed recommendations on how to lay tiles on the wall, glue wallpaper or. The only problem that can somewhat complicate the task is the disastrously rapid growth in the range of finishing materials and, as a result, some instructions become irrelevant.
In this new, up-to-date article, we will try to focus your attention on the general conclusions on the topic "how to lay" that you could be guided by when choosing several types of coverage.
What is a laminate? This is one of the modernized floor coverings that could combine the best qualities of parquet, excellent performance and ease of installation of floating floors.
Laminate options. Measuring the proportions of a room
Several styling options have been developed. By applying each of the techniques, you can visually transform the free space of the room.
Also read articles:
Here is considered three ways to get the job done:
- Diagonally;
- Transverse;
- Longitudinal.
Laminate can also be laid on a laminate, but the main thing is to follow one "golden" rule - the surface must be brought to "zero", clean and dust-free.
Attention!
It is a mistake to take the substrate for a leveling layer. This representation is fundamentally wrong - this is a false opinion about the functions of the insulating layer, and an absolute delusion in the installation of flooring. Each type of floor has its own allowable measures of deviation from a perfectly flat horizon. However, in general, the base should not be crooked and swollen.
The second common mistake is the lack of the necessary gaps between the walls and the boards adjacent to them, as well as at the locations of the heating pipes. Dilatation gaps are necessary so that during the temperature difference the expanded laminate does not deform.

A set of tools necessary for installation
So that your first building experience is not deplorable, you need to carefully prepare for the installation "cases". And above all, stock up on all the necessary tools. You should not hope that you can get by with a compass, an old hacksaw and a screwdriver with a hammer.
If you take a responsible approach to the performance of work, then you will need:
- Roulette;
- Square;
- Wedges - it is with their help that you will make all the necessary gaps;
- Hacksaw with small teeth or electric jigsaw;
- A hammer;
- Doboynik, for finishing tamping of the laminate panel;
- Molar knife. It is convenient for them to open the package;
- Building level;
- Staple. Mounting device that will help to lay even in the most inaccessible places.
- Pencil. How else to markup?
Laminate laying technology
We prepare the basis
We have already said that the surface of the base must be perfectly flat. Only whether the subfloor is even is determined not “by the eye of Uncle Vasya”, but with the help of a two-meter (or longer) building level. Since different brands of laminate flooring allow different differences in the base, then be guided by the manufacturer's instructions and the numbers that he indicated on the package. If the unevenness is above the permissible norm, then level the base yourself by applying a stabilizing layer or by grinding. Neglect will be a big mistake, as you risk getting a poorly made floor that will quickly become unusable. And you can't blame anyone but yourself.
Humidity
One more thing - it is important to comply with the preliminary preparation? Naturally, there are restrictions on humidity. They are also worth remembering. In Russia, this limit is reduced to 5%.
However some manufacturers put forward their own requirements:
- for a wooden base - 8%;
- for concrete - 2%;
- for anhydrite - 0.5%.
Important background information
In Europe, 3.5 - 4% is defined - it is considered optimal, since with a thickness of the screed itself of five centimeters, one percent of moisture is on average a liter of water. The probability that water will rise and fall into the coating, accumulating under the substrate, is quite high.
That is, as I hope it has already become clear, humidity is an important indicator. If there is no way to determine its percentage using instruments, you can use the old method - cover the base with plastic wrap and leave it overnight. If in the morning condensation accumulates on the reverse side of the film, then the base has not yet dried completely, therefore, it is worth postponing the installation.

Substrate mounting
If you are convinced that the subfloor is ready for further work, smoothly proceed to the installation of the vapor barrier and. If you have already read some articles on similar topics, you should know that plastic film is mainly used as a vapor barrier.
Its thickness must be at least 0.2 mm. It is worth spreading the film overlapping with a margin (at least twenty centimeters), and glue the joints with adhesive tape. From above, we lay a substrate on polyethylene.
The latter absorbs shock and static loads, provides high sound insulation of the room and effective heat saving. In addition, the substrate absorbs noise, i.e. laminate does not "drum" while someone moves on it.
- Cork mat;
- Felt;
- Corrugated cardboard;
- Plates from natural materials.
It is quite clear that not everyone can afford to splurge on natural material, because the price of such a substrate is commensurate with the price of the lamellas themselves. In this case, a budget option is more suitable - a substrate made of synthetic modern materials. Someone will say that this is not very environmentally friendly, but this option will also provide sound insulation and save heat.
Rules for laying laminate
- Once you have your laminate flooring delivered to your home, do not rush to unpack it right away. You should wait two days and let him acclimatize in the room where the laying will take place;
- Further actions will already depend on the type of laminate: glued or glueless, with "Click" or "Lock" locks.
The invention of such connections made it possible to reduce the installation time. In addition, if necessary, it is possible to dismantle the defective area without disassembling the entire floor. locks can be done alone - the main thing is to follow the instructions on the package.
On all sides, the boards interlock with each other, the so-called "comb" - that is, the groove (aka the comb) of one lamella is inserted into the groove of the other. Then there is their tight docking. A hammer is usually used for this.
The technology of work is quite simple. You can start from any end of the room - the main thing is that the laying is perpendicular to the window opening. This will hide the joints between the boards.

We lay out the boards along the entire wall as follows: from the end side to the end of the board (over the crest), attach the bar. After adjusting the lamellas to each other by lightly tapping the hammer on the bar. The end of the board must be rested against the wall, providing a gap. At the very end, you need to cut the board to the required size. The first strip of the floor is ready. Press it against the wall as tightly as possible. Having previously inserted wedges from all sides. The second strip of the laminate floor is laid in the same way, only with some offset - you should get a checkerboard pattern. You should also saw off the pollinated board and start from there. The chess way of laying evenly distributes the load over the entire surface and does not allow the floor to “walk”.
Boards in the second row fit tightly to each other. Insert the combs into the slots at a twenty degree angle. Press them tighter, gently pressing from above. The second strip with a comb should enter the first strip, pressed against the wall. The main thing is not to accidentally confuse the strips and not start inserting them on the other side. In other words, the ridge must fit exactly into the groove, and not the groove into the groove or the ridge into the ridge.
If there is a gap between the laminate strips, use a hammer with a bar and fit one strip to the other by lightly tapping along the entire strip. Tap on top of the groove, not on it, otherwise you will damage it.
All rows are assembled and connected in a similar way. The main thing is not to forget about the wedges between the extreme laminate strips and the walls. The distance between them must be at least 10 mm.
The installation of the last row can be difficult, since you need to make accurate measurements and carefully cut the boards. Also, the last sheet must be adjusted tighter. For this, a profile or iron strip is usually used. This strip is folded around the edges. On the one hand, the bend should be half a centimeter, and on the opposite (to the other side) about 1 - 1.5 cm (you will knock on the long fold with a hammer). A homemade tool can replace a professional brace.
How to lay the laminate yourself (video)
Getting around obstacles such as door sills or a pipe is not difficult. It is enough to make the necessary cuts in the floorboards, also providing for a small gap and lay them. After skirting, you mask the gaps between the walls and the extreme rows of laminate. This finishes the finishing work.
How to make a floor that is reliable, beautiful, easy to install and at the same time inexpensive? These seemingly incompatible qualities are combined in a laminate. Therefore, this flooring is used more and more often. However, in order for the floor to serve for a long time, it is simply necessary to know the intricacies of the technology. For example, before laying a laminate, you need to check how even the base is. The maximum allowable deviation is no more than 1-2 mm per meter of surface. Only under this condition will it lie tightly, will not bend and creak. If the differences are greater, the lock may even break or the board may crack.
If the base has irregularities, the dimensions of which exceed the allowable ones, it must be leveled. For cement floors, everything is simple - a leveling screed is poured. The laying of the laminate begins after the solution gains at least 50% strength.
If an old wooden floor serves as a base, it must be removed according to the technology, then a full-fledged cement floor should be made, with all the necessary layers (filling, hydro and thermal insulation, reinforcing belt and screed). It is possible to mount a heating system in this floor, and lay a floor covering on the warm floor. Only in this case it is necessary to use special grades of laminate that tolerate heat well. The cost of such a floor is high, and it takes a lot of time to install it. That's why they don't always do it. If the logs and boards are not damaged, you can level the wooden floor with plywood, and lay the laminate on it.
When leveling a wooden floor, all strongly protruding fragments are scraped off with a planer or with the help of scraping, the cracks are sealed with putty. Sheets of plywood are laid on the prepared old wooden floor (it is used more often, although any sheet material with a flat surface can be laid). They are fixed with screws to the floor: along the perimeter after 15 cm, in the middle in a checkerboard pattern.
The joints of the sheets are displaced - they should not match (see the photo below). So the load is transferred more evenly. One more thing - leave some gaps between the sheets - they should not be fitted close to each other. Wood changes dimensions depending on humidity and temperature. And these gaps will give the necessary freedom so that there are no "humps" and distortions.
Laying plywood on a wooden floor under a laminate is a common way to prepare the subfloor during renovations. If the wood has not been damaged, and the plywood is laid evenly, does not “play” and does not sag, such a base will last for years.

Substrate for laminate
On a flat and clean base, the substrate is first laid. It hides those irregularities of 1-2 mm that are acceptable and makes the floor less “noisy”. It also serves for depreciation and better redistribution of the load.
The substrate is made of several types:
- Cork. Made from cork chips. It has good thermal insulation properties, absorbs sounds. Disadvantages: afraid of moisture and does not like heat. Therefore, its scope is premises without floor heating, with normal importance and minimal risk of a “flood”. That is, living rooms. Cork underlay for laminate flooring is used infrequently: expensive. If they put it, then more under the parquet board - for the safety of the flooring.

Cork is the best, but also the most expensive type of substrate. Foil - a little cheaper, and its plus - it is suitable for underfloor heating
- Bitumen-cork on a cellulose basis. On a layer of cellulose impregnated with bitumen, small cork fragments are poured. This underlay is slightly cheaper than cork underlayment, but its main advantage is that it can be used to lay over an underfloor heating system.
- Made from polyethylene foam. It tolerates high humidity well, conducts heat poorly, is chemically neutral, resistant to bacteria, easy to use (available in the form of rolls), has a low price. Disadvantages: sensitive to ultraviolet radiation, quickly loses its shape, has a short service life, poorly “extinguishes” sounds. Therefore, this substrate is used under a cheap laminate: their service life is comparable.

- From polystyrene foam. It has a rather high density, due to which it smooths out irregularities, keeps its shape well, has good heat-insulating properties, and muffles sounds. Disadvantage: cannot be used for laying laminate flooring on underfloor heating. The price is between cork and polyethylene, it is the most acceptable and is used most often. It is produced more often in the form of plates, sometimes in rolls.
- Polyurethane foil. This type of substrate can also be used for laying under a laminate on a warm floor. It has the best features of all the above, as well as the best prices. But if you are going to lay an expensive laminate, then these are justified expenses: the life of this type of flooring largely depends on the quality of the substrate.

Expanded polystyrene - average quality and price
How to lay the underlay
The substrate for the laminate is rolled out (lay out) along the wall from which the laying will begin. In length, it should cover the entire floor from wall to wall. The lines of the joints are combined tightly, for convenience they are glued with adhesive tape. Sometimes the panels are fixed with staples from a construction stapler. This is faster, but staples are not very good to use - they can rub against the boards and make an unpleasant sound. The next layer is spread as needed - you don’t need to immediately cover the entire floor: it’s better not to walk on the substrate.
Laying schemes
In which direction to lay the laminate with your own hands? There are no strict rules, but there are recommendations. To make the joints along the boards less visible, the direction of the light should go along the board. It turns out beautifully if you lay the coating at an angle. But this method is more complicated and more waste is obtained. You can also lay it across the world - this is also practiced, and it does not threaten anything but more visual seams.

Laying laminate relative to the window: layout of elements
The main rule that must be observed when laying a laminate is the offset of the seams. The minimum transverse seam should be at a distance of 40 cm from the other. So the strength of the flooring will be greater: the boards will not disperse under load.

The minimum distance between seams in adjacent rows is 40 cm
The layout of the laminate flooring should be designed with this rule in mind. The simplest for independent execution is a shift by half the board. Then every odd row starts with a whole, and every even row starts with a half (or vice versa).
If the length of one element exceeds 1.2 m, then you can shift the second row by 1/3, the third by 2/3 of the length (as in the photo above). It turns out a kind of "ladder". In some types of laminate (expensive), the minimum row offset is much less - maybe 15 cm. This is indicated on the packaging or in the accompanying instructions.

You can lay the laminate with a "ladder", only you need to observe the minimum allowable displacement of the seam. On the right - laying scheme with a long board length and a small offset
You might be interested in reading about or about.
How to lay laminate with your own hands: step by step instructions
The laying technology is the same: there are only some features when connecting elements, depending on the locks. The procedure will be like this:

If the geometry of the room is correct, no difficulties. If there are distortions - you will have to cut. Questions may arise when finishing the threshold: the board near the jambs is not cut evenly, but in an arc, while maintaining a gap of 10-15 mm. Why in an arc? So under the door trim of any shape there will be no hole.
Laminate laying methods: two locks - two methods (video instructions)
Laminate laying technology depends on which of the locks on your flooring. They are made in two types - "click" (Click) and "Lock" (Lock). You will not get confused, because the system is written on the packaging of each pack, and pictograms are drawn on many of them explaining the principle of laying.

Hammerless Method - Click Lock
When using click locks, it is more convenient to collect the planks one by one. The system is named so because of the characteristic click that is heard when the spike enters the groove. With such a system, the side locks are first connected, then the longitudinal ones. It happens like this:

How to lay a laminate with a click lock, see the video.
How to lay with a lock "Lock" (Lock)
Here the lock should be inserted from the side and the assembly method is different. You will need a piece of laminate with a spike and a light hammer (rubber mallet). The boards are laid out on the floor, corrected so that they lie exactly one relative to the other. They move it so that the spike is close to the groove, insert a piece of laminate on the other side and tap it with a hammer, achieving a connection.

How to lay down a laminate with the "lock" system
The method is also simple, but requires caution: the hammer can hit too hard and break the lock. Then you have to use another element.
With this method, it is more convenient to lay a laminate, first collecting individual rows, and then connecting them. Schematically, this is shown in the photo below.

So it is more convenient to lay the laminate with your own hands with the "lok" system
See the video for more details on this method. There is no sound row, but everything is clear.
The methods of laying the laminate described above can be made almost airtight, in any case, the amount of water that can get into the interstitial space is greatly reduced. To do this, use a special glue. They coat the spikes of the stacked boards. The composition retains its elasticity for 10 minutes, therefore glue is applied immediately before installation.
The disadvantage of this technology is that the coating becomes almost monolithic. If you need to replace one or more boards, this will not work.
How to cut laminate straight
You can cut laminate boards:
- electric jigsaw (most convenient);
- hacksaw;
- manual circular saw.
To prevent burrs from forming on the front surface when sawing, it should lie with its “face” up. In order for the cut to be even, guides are used - rulers (slats) made of metal or wood. When using a hacksaw, the ruler should not make it possible to “climb” into the desired half.

When cutting across, it is more convenient to use squares. It is pressed against the long side, the second serves as a guide.
How to properly lay a laminate is of interest to many. There are many laying methods, since each brand of laminated panels has its own characteristics and is designed for installation in certain conditions. For example, some boards are suitable for laying on a warm floor, while others are not, so the process will be different.
Do-it-yourself laminate flooring is not difficult
Each manufacturer in the price list specifies the installation procedure and gives recommendations for laying their products. You just need to follow the memo, and then laying the laminate with your own hands will not present difficulties, and a well-mounted floor will last for many years.
Transportation and storage of laminate
Although the laminate of reliable manufacturers is manufactured on the basis of high-precision technologies with indispensable quality control at each stage, nevertheless, damage to the panels cannot be completely ruled out.

Laminate is made on the basis of high-precision technologies with indispensable quality control at each stage
This can happen due to improper transportation of the flooring and violation of storage conditions.
Hence the conclusion:
- it is necessary to transport the laminate only in factory packaging, checking their integrity before loading;
- do not throw packages on the floor, so reduce the load on your arms and back as much as possible when carrying them and avoid sharp turns;
- you need to remove all obstacles from the path in advance;
- laminate should be stored in the same temperature regime in which it will be laid;
- it is necessary to avoid direct sunlight, this is especially true in the presence of panoramic windows;
- before laying, the panels should be unpacked, laid out evenly in the room at a distance of at least half a meter from the walls and left for 48 hours to acclimatize.
Necessary materials, tools and aids
To properly lay the laminate floor in the apartment, you will need:
- folding rule, level, pencil, ruler, corner and gaskets;
- laminate tamping bar and rubber mallet;

Tools needed for laying laminate flooring
- fine-toothed hacksaw and knife, which can be replaced with an electric jigsaw or a circular saw with a fine-toothed blade;
- plinth of a suitable design;
- plastic film, if the laminate is laid on a concrete floor;
- sound-absorbing underlay for laminate flooring;
- mounting clamp and spacer wedges.


What you need to know when installing laminate flooring yourself
To understand how to properly lay a laminate with your own hands, you need to familiarize yourself with the manufacturer's requirements set out in the package insert and watch the training videos.
Compliance with the instructions is a necessary condition, and in case of damage to the panels due to a violated technology, the guarantee for a free replacement of the material is not valid.

Scheme of laminate laying technology
Key points:
- initially check the quality of laminated boards and carry out acclimatization;
- use the flooring strictly in the specified rooms;
- carefully prepare the base for the laminate, which must be dry, even, clean and smooth;
- lay soundproofing material on the base, and when laying on concrete, first cover it with a film, forming a waterproofing barrier;
- lay the substrate on top of the insulating layer;
- choose the correct location of the panels relative to the light and walls - along or across. In large rooms not cluttered with furniture, the laminate is laid along the main light source, which will help hide the seams and achieve a natural palette of colors, and in order to visually expand the space, they mount the coating across the walls;
- the panels are laid most often according to the brickwork method, which reduces the load on them during operation;
- so that the laminated boards do not swell, you need to leave a gap of 5-10 mm between the edge of the coating, walls and doorways;
- after laying, it is necessary to check the tightness of the joints, and during the installation process, use high-quality and suitable sealants.
Of considerable importance for the trouble-free and durable operation of a laminate floor is the correct choice of base, which is necessarily indicated by manufacturers in the recommendations.
For example, it can be a concrete screed over a warm floor, old wood flooring, asphalt, tiles, linoleum, chipboard. Carpets, foamed PVC flooring and similar materials are not suitable as a base for laminate flooring and must therefore be dismantled. Otherwise:
- when walking, the seams can disperse;
- moisture accumulated under them will lead to the formation of mold and fungus on the inner surface of the laminate and its destruction.
Before laying laminate flooring on a wooden floor or other base, you need to prepare for the workflow.

Diagonal styling visually expands the space
The preparatory stage is:
- in sorting panels by texture, shade and decorative pattern;
- in measuring the room in order to calculate the number of panels and determine whether the first row needs to be narrowed in width in case of curvature of the walls.
Important! Remember: in order to achieve the best result in terms of color perception, lay laminated boards mixed from different packages.
Work order:
- The base is cleaned of debris and leveled. The better the base is prepared, the easier it will be to install the panels and the more durable the laminate floor will be.
- Lay waterproofing in the form of a PE film with an overlap of 15 cm and gluing the joints with adhesive tape. It is recommended to run the film a little on the wall and subsequently close it with a plinth.
- A substrate is laid on top of the insulation, which will hide minor irregularities and make the base smooth. Unlike a waterproofing film, the substrate should be laid butt-to-butt with fixation of the seams with adhesive tape.
- Start laying from the left corner of the room. Assemble the laminate with a lock on itself, which will facilitate the snapping of the panels. Having laid the first board, fix the distance from the edge of the panels to the walls along the entire perimeter with spacers or spacers.
- The second board is laid, inserting it at an angle of ≈ 45º into the lock of the previous one and smoothly lowering it.
- The longitudinal edges must form a straight line in order to lay the second row of panels in the longitudinal profile without seams.
- They reach the end of the first row, and then, with uneven walls, the last board is turned 180º and cut, keeping a distance of 5–10 mm from the wall, depending on the length of the panels.
- Laying the second and subsequent rows begins with a cut piece of the last panel of the previous row, if its length is not less than 40 and not more than 90 cm. This will reduce the consumption of materials and ensure that the seams are staggered.
- The board of the second row is lifted with the long side at an angle of ≈ 45º, applied to the board of the first row, inserted into the groove, hammering the beam attached to the board with a hammer, and snapped into place. The connection must be tight.
- Continue laying the rows until the entire space is covered, and remove the spacers. The last panel is mounted with a clamp.
- For pipes encountered on the way, strobes are made 10–20 mm larger than the diameter of the pipes, a part is cut out to fit, glue is applied to it, inserted and fixed until completely dry, and then the strobes are lined with cuffs for heating elements.
- They nail the plinth and equip the sills.
Some nuances exist when laying laminated boards diagonally. This technique is more complex, but it brings a peculiar zest to the interior and emphasizes the individuality of the situation.

To achieve the best result in terms of color perception, lay laminated boards mixed from different packages.
In addition, diagonal styling visually expands the space, which is very valuable for small apartments.
The specifics of diagonal styling
It is not difficult to create an unusual original laminate flooring, you just need to know how to properly lay the laminate diagonally and what are the features of diagonal laying compared to classical technology. The necessary tools and preparatory process are no different from conventional styling.

The conditions are the same - a clean and as even surface as possible, for which it is recommended to use special self-leveling mixtures. They are applied to the floor cleared of debris and leveled with a spatula.
Important: after leveling, the height difference of the base must not exceed 2 mm per square meter.
After the preparatory stage has been completed, the diagonal installation of the laminate floor begins:
1. Choose the direction of laying the boards. An angle of ≈ 35-45º is considered optimal.
2. Calculate the amount of laminate. Here lies the first feature, since the diagonal calculation has a formula - you need to add the product of the width of the room x 1.42 x the width of one board to the area of \u200b\u200bthe room. For example: the length of the room is 5 m, the width is 3 m, the length of the selected laminated board is 1 m, and its width is 0.1 m. Then:
- room area 5 x 3 = 15 m²;
- spare material area 3 x 1.42 x 0.1 = 0.436 m²;
- substitute the values in the formula 15 + 0.436 \u003d 15.436 m²;
- divide the result obtained by the area of one board (0.1 x 1 \u003d 0.1) and get the number of laminated boards, i.e. 15.436/0.1 = 154.36 ≈ 155 pieces + 10% stock ≈ 170 panels required for diagonal decking.
3. Stretch the rope diagonally to control the laying angle and prevent deviations.
4. After the leveling mixture has hardened, the surface is covered with cellophane, on top of which a substrate or cork sheets are laid with gluing the joints with adhesive tape.
5. To simplify the installation process, experts advise starting diagonal laying from the center of the room, since it is much more convenient to work with long panels than with small triangles.
6. After laying several rows, check whether the angle of inclination is evenly maintained, and snap the boards using a rubber hammer to fit.
7. Spacers fix the gaps between the coating and the walls.
8. Equip the pipe passages, if any, sealing them with silicone sealant of a suitable shade.
9. Remove the spacers and mount the plinth, preferably with ready-made internal channels for pulling cables.
The main differences of diagonal styling:
- the first panel of each new row is selected separately, and the pieces of the last board of the previous row are not used, as in the standard technique;
- to cut the last panel in a row, proceed as follows: measure the distance to the wall, taking into account the expansion joint on one side and set aside a point on the board, then measure the distance on the opposite side and mark a new point, then connect the points and cut them along the intended line with an electric jigsaw from the wrong side sides;
- the end sides of the panels are connected in the usual way, and the long sides are connected in the following order: slightly raise the opposite edge of the board, insert a bar into the lock and click on the floor. The panel is slightly wiggled to seal the connection.
Remember these features, follow the recommendations of experts, and the question of how to properly lay the laminate will disappear by itself. Videos will help to visualize the installation process, which will solve all problems, and the time spent watching will fully pay off with an elegant, beautifully laid laminate floor. Good luck with your repair.


So, the choice in favor of a laminated floor is made, the material is purchased in the right amount and delivered to the installation site.
It remains to invite a team of craftsmen and wait for the work to be done. And is it necessary to pay extra money for the installation of the coating?
A good owner is quite capable of coping with such a task, of course, with certain basic skills, the proper level of accuracy and care.
Laminate laying technology is not in a hurry. So that the laying of the coating itself does not cause difficulties, and so that the resulting floor lasts a long time without losing its operational and decorative qualities, it is necessary to carefully prepare for work.
Assessing the condition of the floor
 Usually, even before making a decision to purchase a laminate, the condition of the “subfloor” is assessed, and appropriate repair and restoration work is carried out.
By and large, a laminated floor can be laid on any surface subject to the main condition - it must be smooth, durable, without areas of dynamic deformation.
Otherwise, "weak" places will inevitably appear on the new coating, where violations of the integrity of the surface, divergence of joints, and the appearance of squeaks are possible.
Ideally, the floor should be strictly horizontal, with allowable differences of no more than 1-2 mm per linear meter.
- should not have significant cracks, gouges, delaminations or crumbling areas. If it is impossible to correct the existing defects, it is impossible to lay on an uneven floor. You will have to update the screed - or. It is possible to start laying the laminate only after the coating has completely hardened, in accordance with the terms established by the concrete work technology.
- If it is supposed, its entire surface must be carefully checked. In the case when areas of “playing” or creaking boards are identified, they are subject to repair or replacement. Possible irregularities can be processed with a planer, grinder, fill existing cavities with wood putty.
- It is possible to lay laminate, provided that there are no holes or bumps on it, delamination of joints, through abrasions, areas of destruction of the concrete base. Such a coating cannot be repaired; it will be easier to remove the linoleum and carefully prepare the base for the laminate.
If funds allow, the ideal option would be to cover the entire floor surface of 10-12 mm, after laying them from below with a plastic film for waterproofing. The process of laying laminate flooring will be greatly simplified, and the sound and thermal insulation qualities of the floor will increase significantly.
We prepare the necessary materials and tools
Good advice to all novice masters - before laying the laminate, after it is delivered from the store, it is worth unpacking the panels and letting them rest for 2-3 days in the room where the flooring will be carried out.
Aligning the temperature and humidity indicators of the material and the room will facilitate the installation process and eliminate the risk of warping of the laid coating.
This time can be devoted to preparing the necessary tools and materials.
First of all, you need to have the required amount available, regardless of the type of base.
The substrate not only has a good insulating effect - it has a shock-absorbing effect, does not allow friction of the laminate board with a rigid base, which ensures the durability of the floor covering.
 The substrate can be polystyrene or polyurethane foam, with or without a heat-reflecting foil coating, produced in rolls or in the form of rectangular panels.
A more expensive, but very high-quality option -.
- The lining material is laid end-to-end, without overlaps, so double-sided tape is required to securely fix it on the floor. You can get by with ordinary adhesive tape, fixing the rows of the substrate at the seams.
- It is worth immediately preparing a set of wooden wedges, 10-12 mm thick, for laying the laminate at the required distance from the walls of the room.
- You can cut laminated panels to the required size with a regular hacksaw or electric jigsaw.
- For high-quality joining of the seams, you will need a hammer, preferably a rubber or wooden one (mallet). You can also use metal, but only necessarily through wooden spacers (bars).
- To mount the coating sections located near the walls, you need to have a small mount, or you can make a lever from a steel strip with a hook and a shoulder protruding upward, through which the hammer force can be transmitted.
In principle, the materials and tools for laying are ready. However, before starting work, there are a few more points to consider.
How to Avoid Unwanted Mistakes
It is best to precede the laying by drawing up a plan carefully drawn on a scale - the required visibility and clarity in further actions will appear.
What is important to consider:

- When answering the question: how to lay the laminate along or across, the following is important: the direction of the longitudinal joints should be parallel to the direction of the rays from the main source of natural light (windows) - in this case, the seams will practically not be noticeable.
- The laying direction, as a rule, from the far left corner, is orderly. For the panels of the first row adjacent to the wall, the groove should be outward, and the spike should be cut so that a flat end is obtained. Longitudinal sawing of panels is best done with a circular or vertical hand-held electric saw.
- On the plan, be sure to take into account that the last, final laying strip must have a width of at least 100 mm. If not, you will have to reduce the width of the first row. The same should be taken into account if there are any internal corners in the room.
- The thickness of the laid coating should not interfere with the free opening of the doors. Sometimes you have to remove and cut the door leaf from below in advance.
- When planning, do not forget about the pipes passing through the thickness of the floor. To cut curly grooves, they will definitely need a jigsaw.
After thinking through all the theoretical issues, you can proceed directly to the installation.
Laminate installation process
Laminated floor panels are available in a lock or adhesive version. In turn, locks can be one of several systems - "Click", "Lock", "5G".
How to properly install laminate?
Each type of laminate has its own installation features.
Features of laying laminate with the "Click" system
 Currently, this is the most common locking system among laminate manufacturers and a popular locking system among craftsmen.
Its main difference from others is that you can insert a figured spike into a complex groove only at a certain angle - for different manufacturers - from 25 to 45 degrees.
When the two panels are rotated into the same plane, the lock locks securely.
Convenience also lies in the fact that disassembling the coating will also not be difficult when the panel is turned, the lock will “open”.
- Work begins with the assembly of the first row of panels. It is laid along the wall and wedged on both sides with 10-12 mm dies. This gap is necessary to compensate for the thermal expansion of the laminated coating. The assembly process is simple - insert the spike at the right angle, aligning the edges exactly, lower the panel down until it clicks into place.
- The assembly of the second row takes place with the provision of displacement of the transverse seams by half the length of the panels (it is allowed - by 30-40 cm). The strip along the entire length is assembled completely, and only then does the connection with the first row follow. This will most likely require an assistant. After fixing the second row, it is also wedged from the walls with blocks from both ends.
- Further work continues in the same order until the room is completely covered.
Be sure to control the cleanliness of the grooves so that there are no sawdust or other debris left.
In the case of a good material fit, a hammer is most likely not even needed.
Features of laying laminate with the "Lock" system
 Such a lock system is gradually falling into disuse, although inexpensive laminate models can be produced with it.
The connection of the thorn and the groove occurs strictly in one plane, and the engagement occurs due to special protrusions and grooves.
The joint turns out to be much less durable, although disassembly, if necessary, is not easy to carry out - the spike may be damaged.
- When assembling the first row, after connecting the end sides of the panels, for the full entry of the spike into the groove, tapping with a hammer through a wooden gasket is carried out. The wedging of the row from the wall is carried out in the same way as in the case of the "Click" system.
- The second row is assembled gradually, one panel at a time (also taking into account the displacement of the transverse seam by half the length of the board). The first panel is inserted into the groove of the first row, tapped with a hammer until it is fully connected, and then wedged from the wall.
- The second panel is tapped on both the long and short sides for reliable fastening of the longitudinal and transverse locks. Further work continues in the same order.
- The most difficult thing is the installation of the last, adjacent to the wall, panel of the row. Here you will need either a mount or a curved lever.
Work is carried out in order or "ladder", to the end of the room. The last row is also carefully mounted with the transfer of force through the lever.
It is very important to correctly measure the force of the hammer blow or the force on the lever so as not to damage the surface of the laminate and not to break the spikes of the lock.
Features of laying adhesive laminate
Such laminated panels, although equipped with a tongue and groove system, do not have a locking connection. Thus, the strength of the joint is provided only by gluing.
Such floors are distinguished by good solidity, moisture resistance, but it will not be possible to dismantle or repair a separate section of the coating.
The installation process is more laborious, in addition, you will need to purchase special glue. It is not recommended to use PVA familiar to everyone.
- Laminate laying technology is generally similar to the "Lock" system - the sequence is the same. The difference is that each groove is abundantly smeared with glue (in accordance with the instructions attached to it). Excess adhesive that has come out after joining the panels is immediately removed with a clean, damp cloth.
- After laying the first three rows, a break of at least 2 hours must be taken so that the glue has time to grab. The same rule applies in the future, until the entire laying of the laminate.
Master class on laying laminate in video format
Video on how to properly lay laminate flooring, shows the laying technology, and preparatory work.
Finishing work
After the entire surface of the floor is covered with laminate, the expansion wedges are removed from the walls. The final step will be the installation of skirting boards that will hide the expansion slots.
It is important to remember that in no case are the skirting boards screwed to the laminate flooring - only to the wall.
The transition to another coating at the junction of adjacent rooms can be closed with a decorative overlay or use.
In fact, the installation work is completed - you can proceed to cleaning the premises and decorating the interior of the room. As you can see, there is nothing prohibitively complicated. The main thing is maximum attention, thoughtfulness of each of your actions and the highest accuracy. Everything should work!
Laminate manufacturers in their advertising campaigns emphasize that the installation of this most popular flooring has become so simple that anyone can handle it. Who has no experience with laminate at all. You need to read the instructions, watch the company's commercial, and as a result of your labors, a room with a new floor will quickly transform, and an admiring family will extol your building achievements. Despite the fact that before installing the flooring, your success in this field was not much different from the ability of one of the characters of the English writer Jerome K. Jerome Uncle Podger to hang pictures.
Indeed, the improvement of panel locking systems has greatly simplified the installation process. If laying laminate flooring with Lock requires a certain amount of experience and skill, the next generation of Click locks does not. And the market already sells laminate with 5g and Megalock locks, and even with aluminum locks. Soon everything will be like in Russian fairy tales, when you only need to bring the packages into the room where the installation will take place, and hold the flooring without opening the box for a couple of days. To adapt to the temperature and humidity in the room. And then you open the packages, and the panels themselves fit "at the behest of the pike." However, as you know, the devil is in the details.
Laying laminate
The job of installing flooring has become much easier. What can not be said about the preparation of the base before laying. The base must be level, stable and dry. The difference in height is acceptable within 2 mm by 2 m. In some cases, a waterproofing device is required before laying the substrate and the laminate itself.
Substrate laying
Substrates differ in the material from which they are made, characteristics and cost:
Manufacturers claim that the substrate is able to level the base under the laminate. This is an exaggeration. The substrate must provide heat and sound insulation. The underlayment can compensate for minimal irregularities in a leveled old wooden floor or plywood subfloor, but no more.
Important! The substrate is laid end-to-end, the joints are fixed with adhesive tape. So it will not move when laying the laminate.

Choice of installation method
We determine the method of laying the coating: diagonally, perpendicularly or parallel to the light (along or across the room). Diagonal mounting is more often used in narrow spaces - this is one way to visually expand them.


It is usually customary to lay the laminate perpendicular to the light source (long side along the light stream) - in the room this is a window. In daylight, the joints between the panels are less visible.

However, when laying the coating on a wooden floor, it is imperative to focus on the direction of the floorboards. On such a floor, the laminate is laid perpendicular to the floor boards to reduce possible deflection. If the old wooden floor is sheathed with plywood on top, the flooring should be laid in the traditional way - perpendicular to the window.

In small narrow rooms without natural light (corridors, hallways), the laminate is laid across in order to visually expand the room.

Laminate flooring with different types of locks
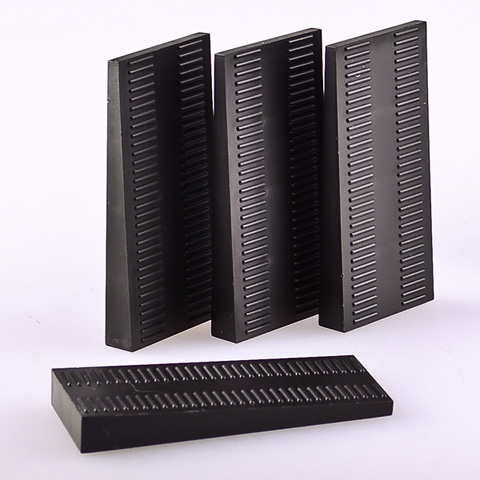
For installation work you will need:

First, plastic wedges are installed to maintain a gap of 10 mm between the laminate and the wall. From the corner of the room in the direction from left to right, the first row is laid horizontally. The crest of the panels of the first row is directed into the wall. The panels are joined at the ends. The last panel in the row is cut with a jigsaw or hacksaw and laid in a row. You can start the next row with the remaining piece of the panel (provided that its length is more than 300 mm). It is important that the seams in adjacent rows do not match.
Advice. To give the panel offsets a neater look, a technique such as “a third of the board offset” is used. One third is cut off from the new panel, after which it fits.

The first and second rows are joined. When using panels with a Lock-lock, you will need to knock them out with a mallet (through a die) to fix the comb in the groove of the adjacent panel.

The Click system panels are laid at an angle of 45° until they click into place. Such a coating can be disassembled if necessary.

The panels of the last row will most likely need to be cut in width to size. Remember that the plinth will cover the cut line, so small irregularities in the place of the cut are not terrible. After the laying of the laminate on the wooden floor is completed, the wedges are removed and the plinth is mounted. See first how much you need to trim the panels of the last row. The floor covering will not look very good if the width of the panels of the first and last rows is very different. In this case, it is better to cut the panels of both the first and last rows.